In this article, you will learn how to add new folders and files to the Documents app.
How to Add a New Folder
Note: While you can add files without a folder, using folders is recommended for better organization.
1. From the Documents app, click the + icon to the right of the Search bar.
2. From the Add new page, click + New Folder.
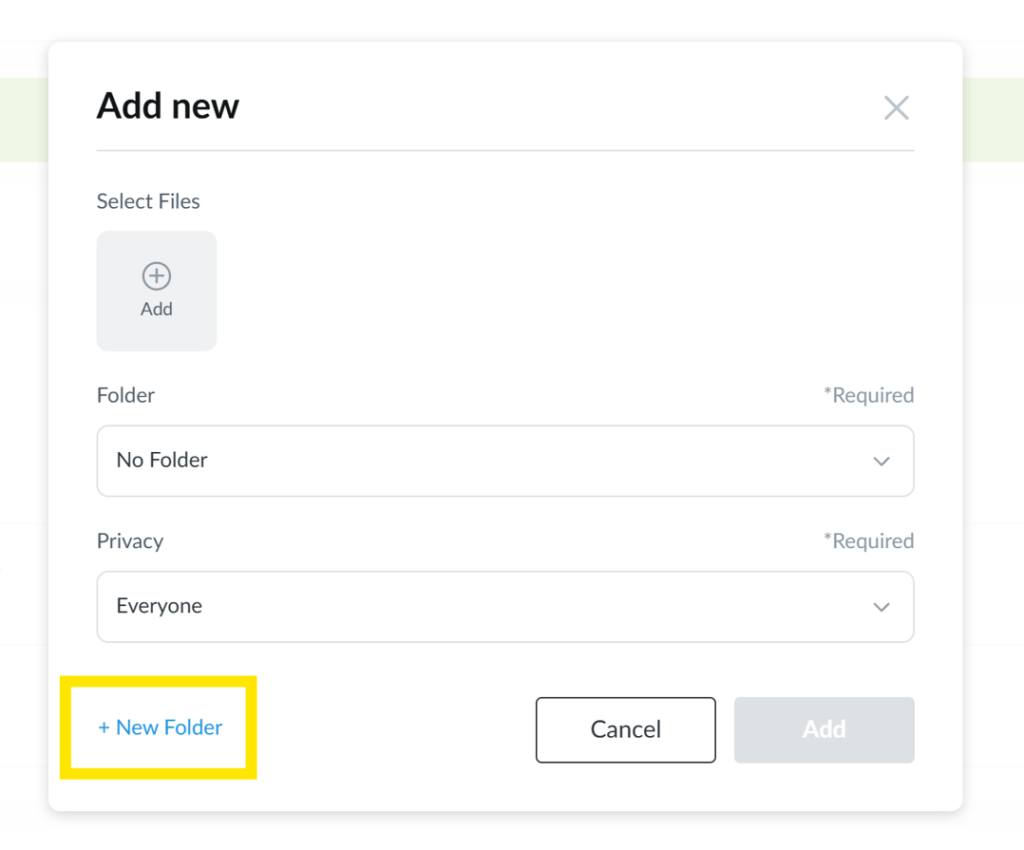
3. Enter the Folder Name, Privacy, and Description.
4. Click Add when finished.
Pro Tip: If you have access to multiple properties, use the Used by field to select which properties can access this folder.
How to Upload a File
1. From the Documents app, click the + icon to the right of the Search bar.
2. If you wish to assign this file to a folder, use the Folder dropdown to select which you will use. If you need to add a new folder, follow the steps above, then you will be able to continue with adding your file. The options that follow will depend on the folder settings.
3. Click the Add icon under Select Files to upload your file(s). Select the additonal dropdowns and click Add when you’re finished.
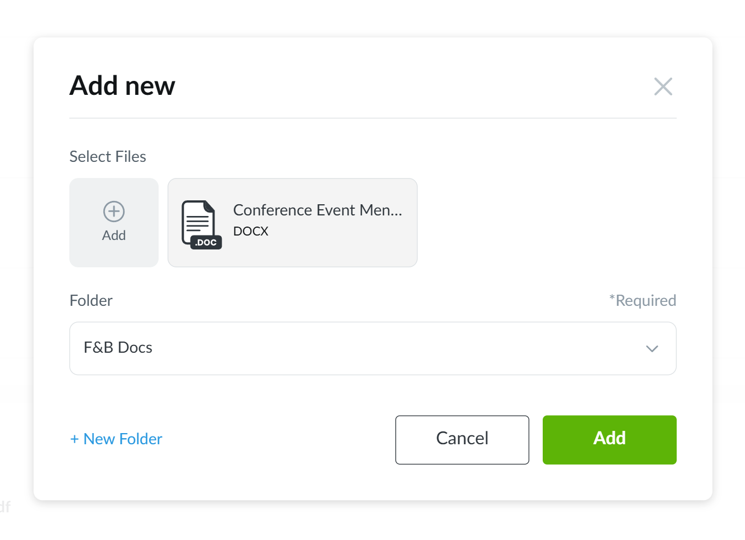
4. The uploaded file(s) will now appear on your Documents page.
Pro Tip: If you have access to multiple properties, use the Used by field to select which properties can access this file.