In this article, you will learn how to add a new event to the Calendar app from the desktop.
Creating a Calendar Event
Note: Calendar events can only be created from the desktop.
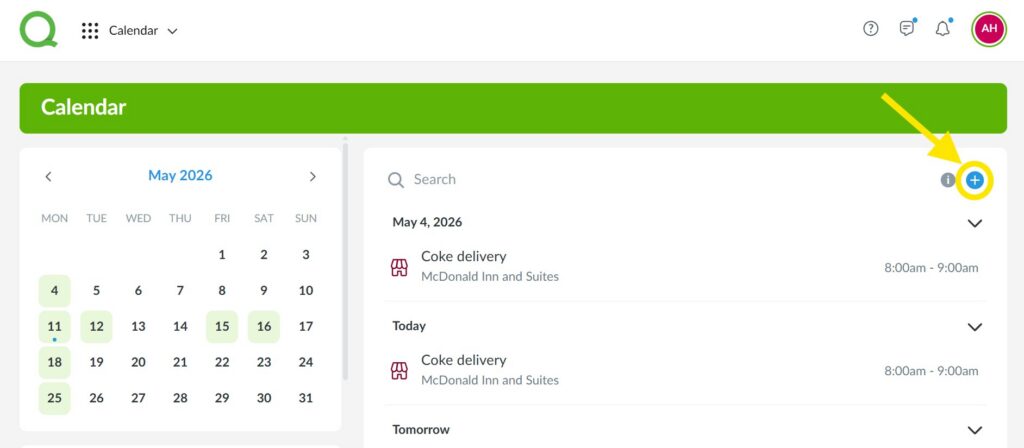
1. From the desktop Calendar app, click the blue + icon.
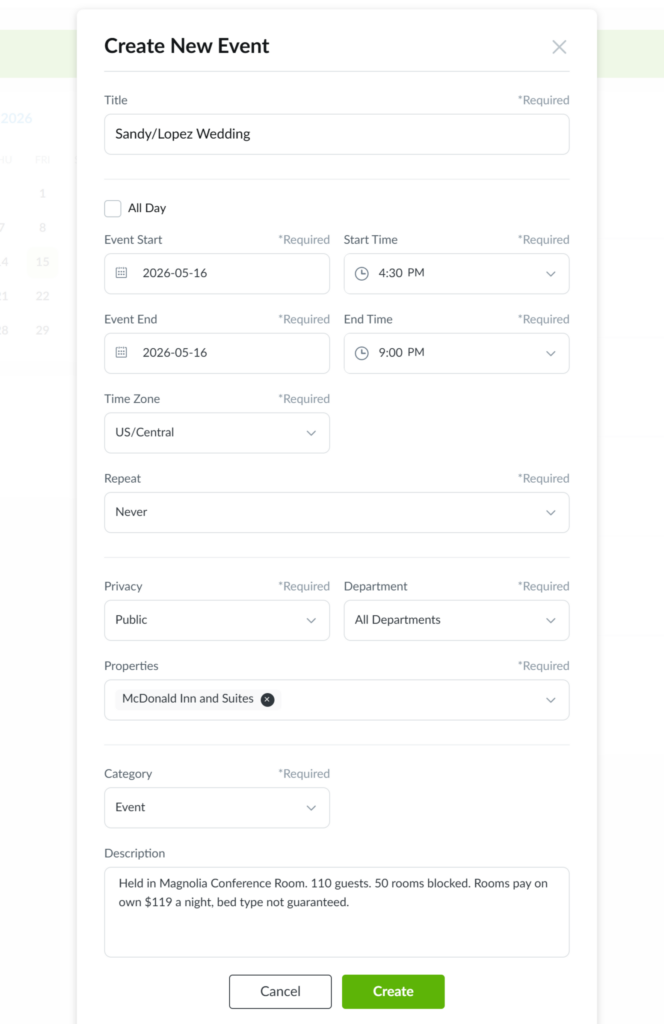
2. On the Create New Event page, fill in the following fields:
- Title
- Event Start Date and Time
- Event End Date and Time
- Time Zone
- Repeat
- Events can be scheduled on a recurring basis.
- Privacy
- Only general managers, assistant managers, and operations managers can post events visible to all departments, while department heads can post events visible to their own department.
- Department
- Which departments have access to view the event.
- Properties
- Which properties have access to view the event.
- Category
- Description
3. Click Create to post the event to the Calendar app.
Pro Tip: This event will appear in the Calendar app on both desktop and mobile, as well as the Dashboard.
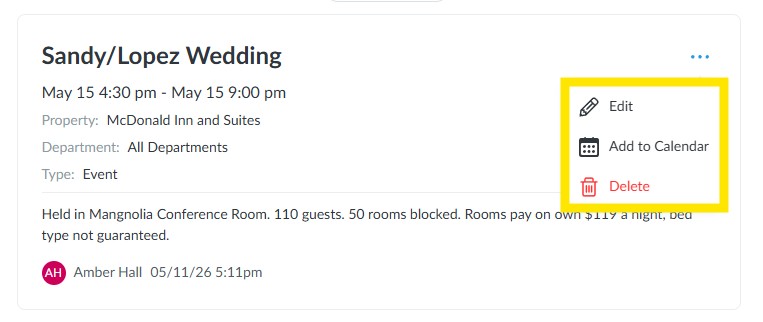
Editing a Calendar Event
Note: You can edit or delete events you created. You can also edit or delete events created by others in your department if you have a higher access level. For example, a front desk manager can edit or delete events posted by a front desk user.
1. Click on the event from the Calendar app on the desktop.
2. Click on the three dot icon in the top-right corner of the event.

3. Click Edit to edit the details of the event or click Delete to remove it from the Calendar app.
4. By clicking Add to Calendar, a .ics file will be downloaded that can import the event into a calendar of your choosing.