In this article, you will learn how to edit inspection templates from the desktop Inspections app.
How to Edit Template Details
Please note that only the creator of an inspection and users with titles above the creator’s can edit or delete that template.
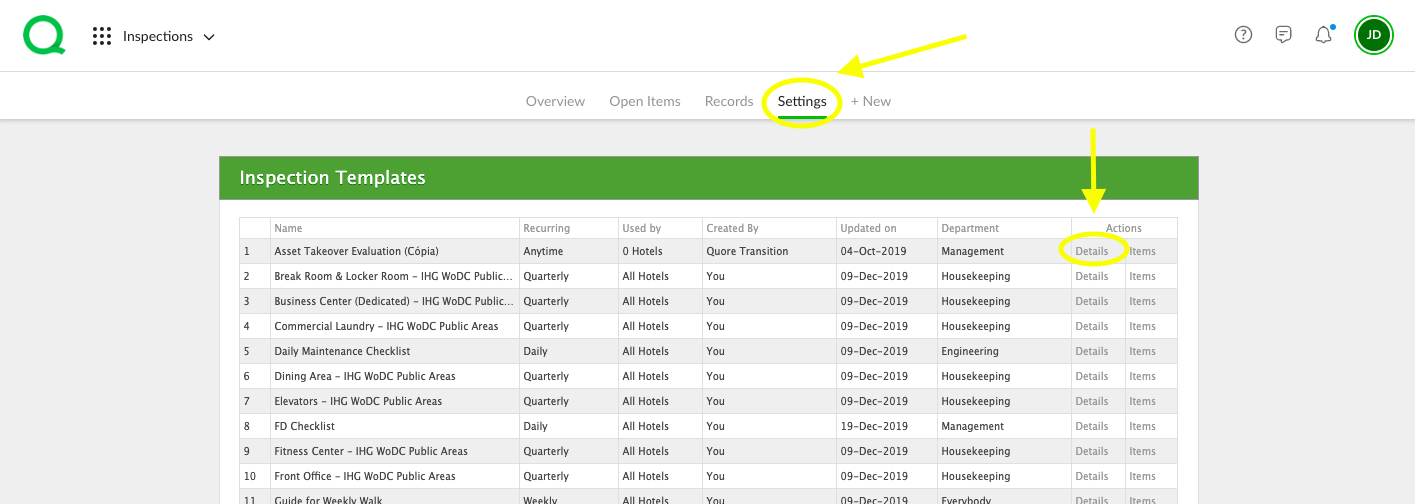
1. From the desktop Inspections app, click on the Templates page button.
2. Click the Details link in far right column.
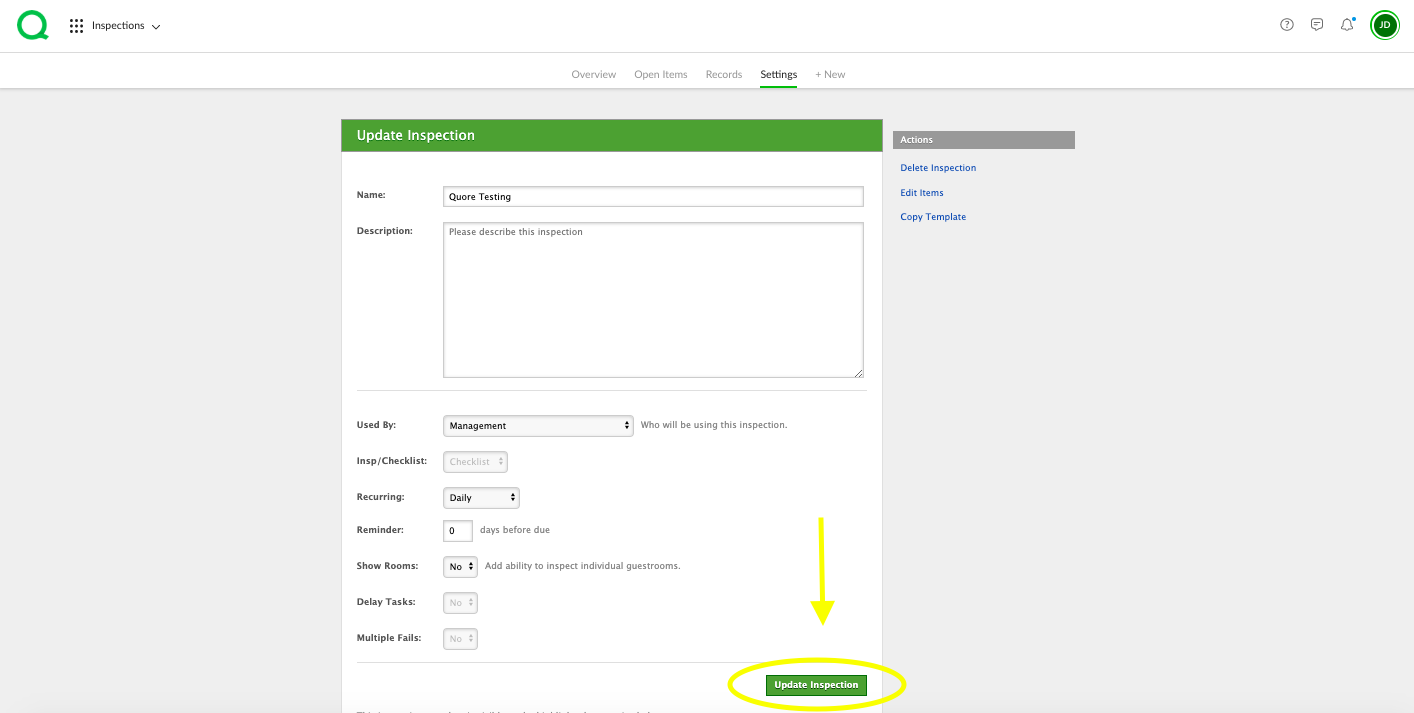
3. From the Update Template page, you can change the template name, description, update the property, assign a department, and edit other inspection details.
4. When all edits have been made, click the green Update button.
How to Edit Inspection Steps
1. From the desktop Inspections app, click on the Templates page button.
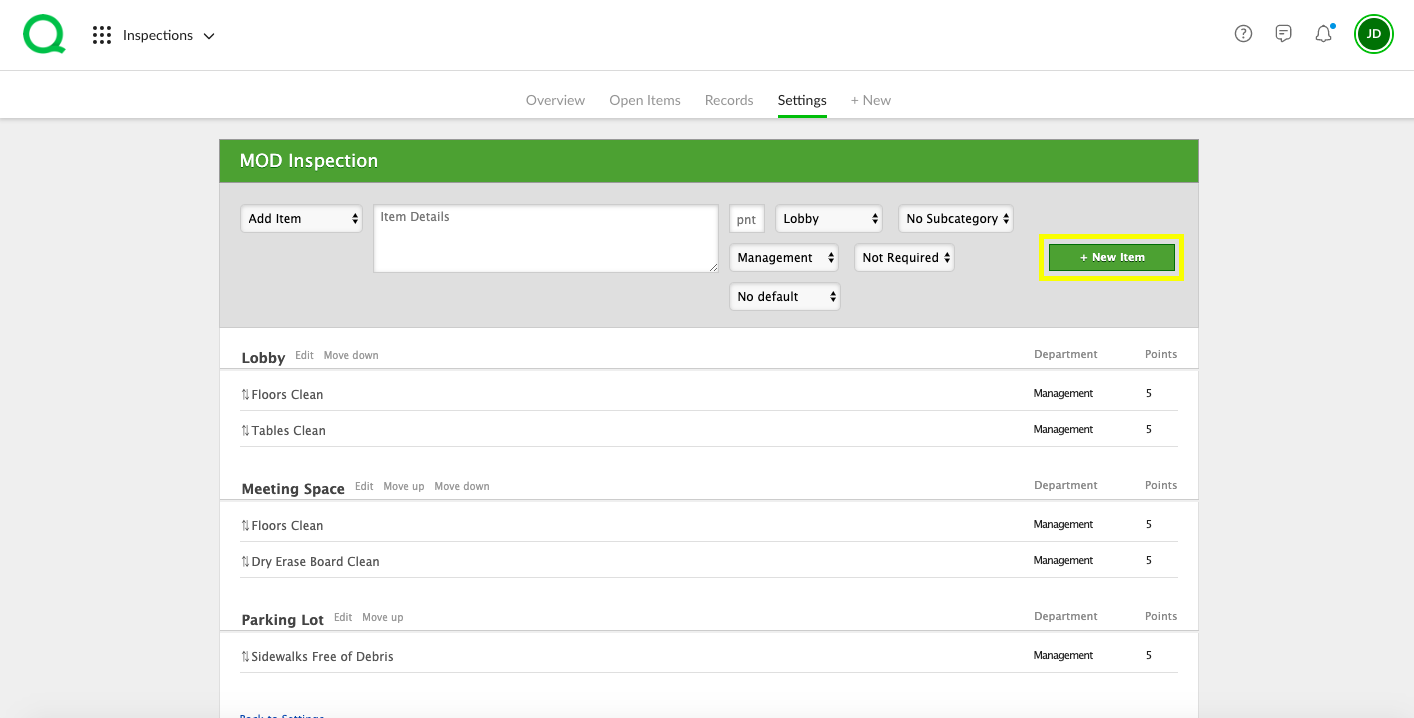
2. Click on the Inspection line to edit the steps.
3. From your Steps page, you can add new categories, subcategories, and steps to your inspection template. To add new steps, click the Add Step button. Steps are required while adding categories and subcategories is optional.
4. To edit a step, click on the step line to make the updates and click out of it to save when finished. This also applies to editing categories and subcategories.
5. To delete a step, click on the three dots on the step line and click Delete. This is also where you can go to Duplicate a step.
How to Copy Inspection Templates
1. From the desktop Inspections app, click on the Templates page button.
2. Click on the Details link in the column to the right.
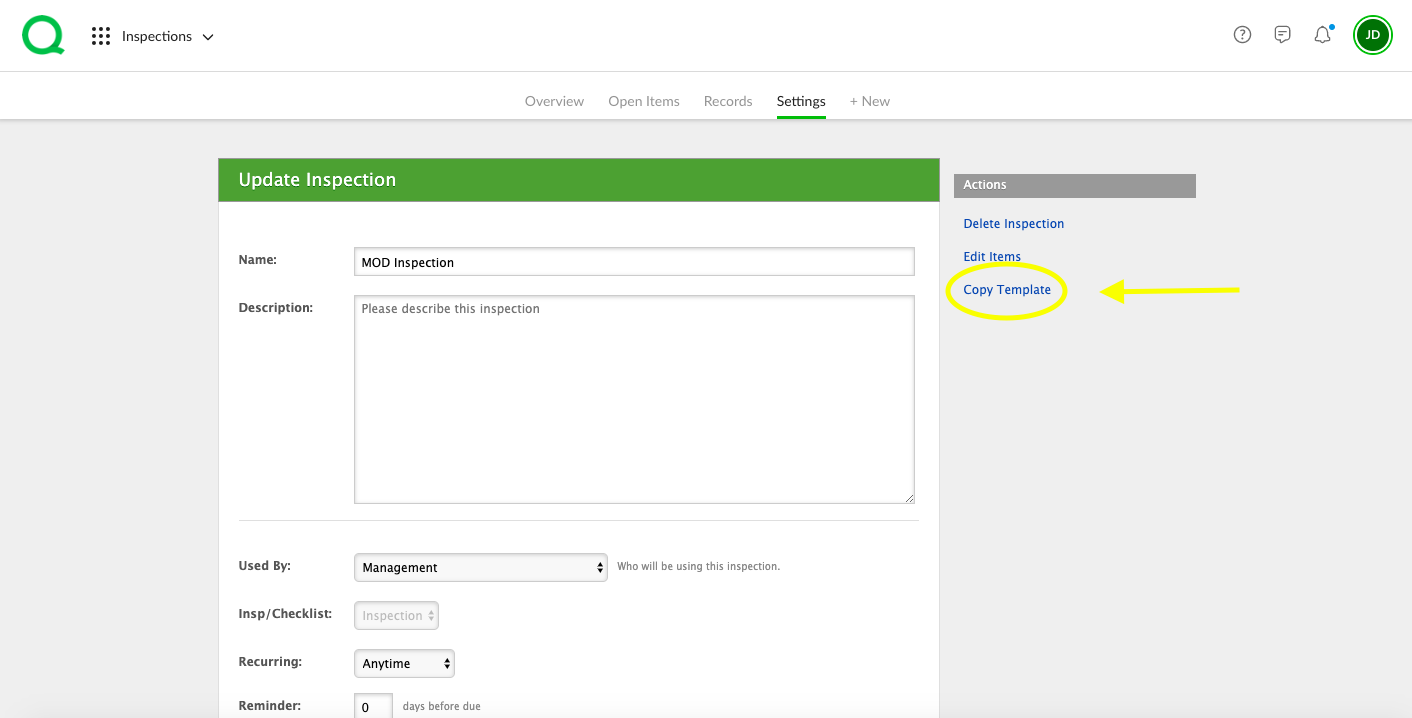
3. Then, from the Update Template page, click Copy Template in the bottom left corner. To confirm, click Create Template.
4. The copied template will appear to make the necessary changes.


