In this article, you will learn how to create templates in the desktop Inspections app.
How to Create a New Inspection Template
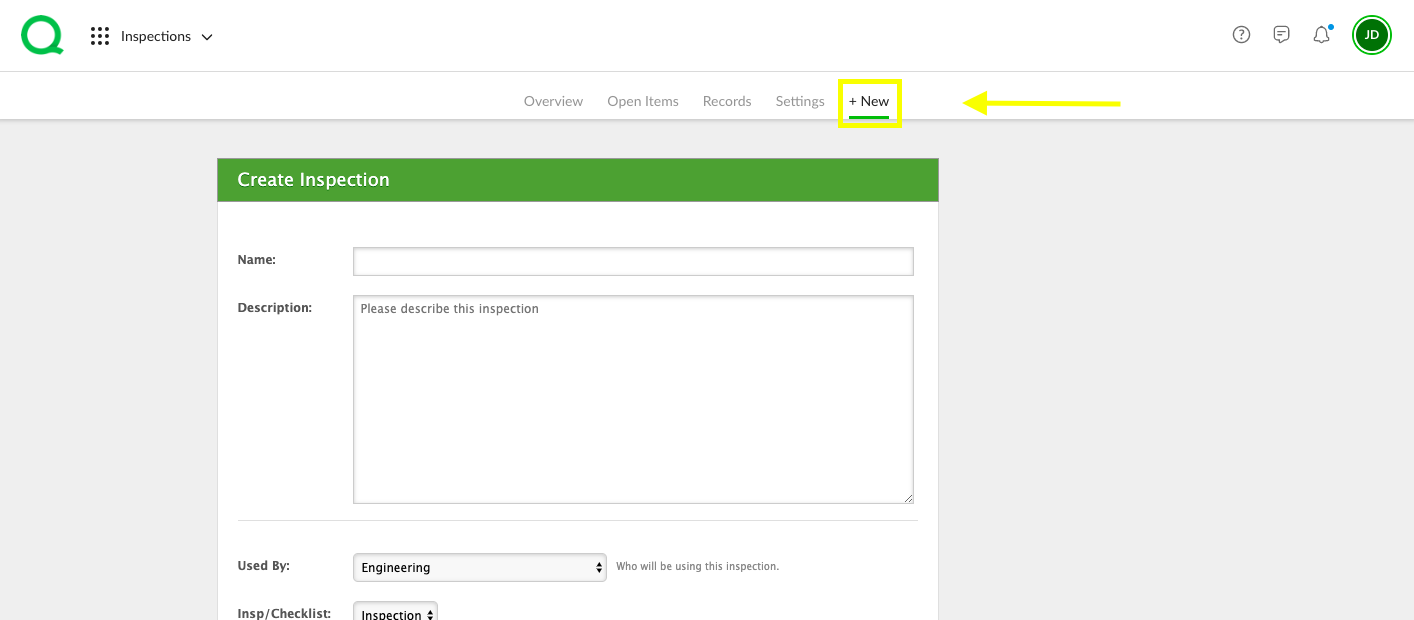
1. From the desktop Inspections app, click on Templates. Click on the Plus (+) icon.
2. Give the template a name and add the description. Do not use the description box to list out your steps as you will do this later.
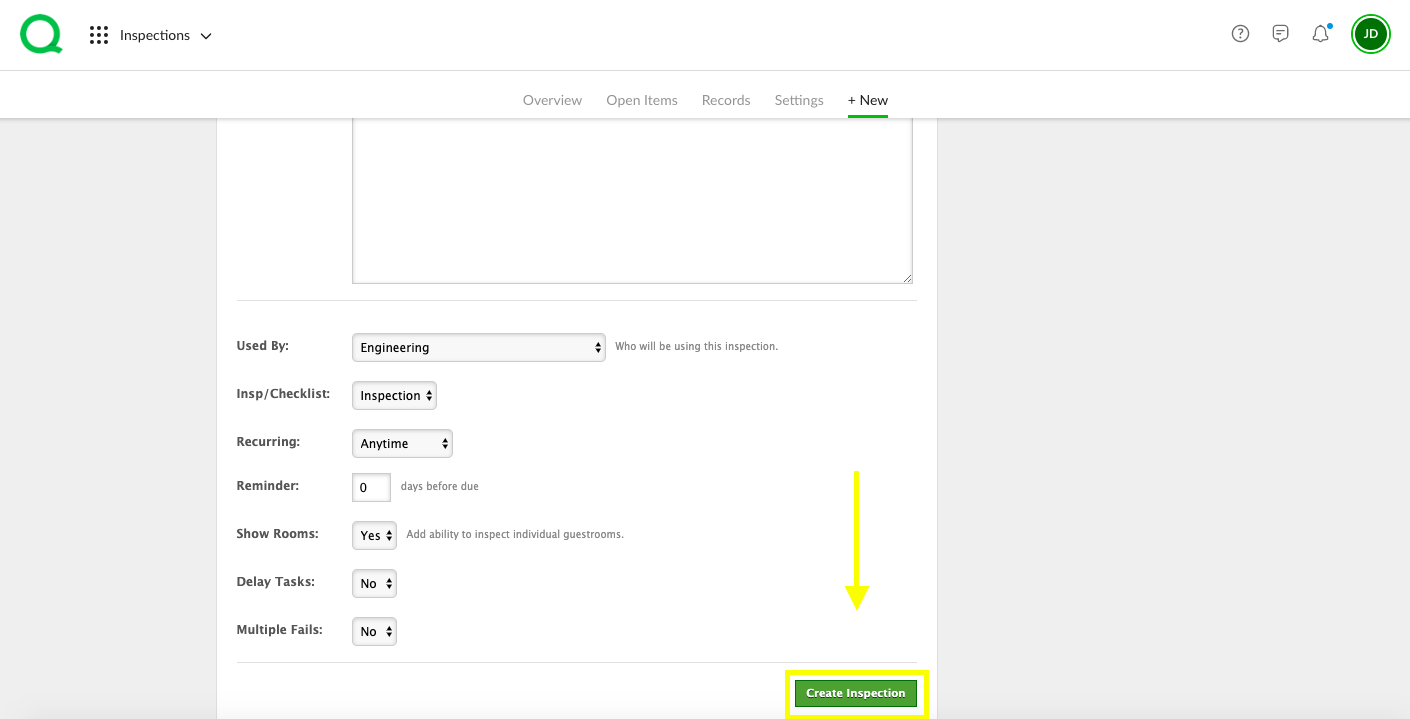
3. Next, select the appropriate options in the following dropdowns:
- Property- select the properties that will be using this checklist or inspection.
- Used By– select the department who will use this checklist or inspection.
-
Inspection/Checklist– this is among the most important options. An inspection will allow Quore to create tasks for failed steps. Selecting Checklist from the dropdown will simply create a checklist with no automatic actions.
-
Frequency– Use this dropdown to select the frequency. You can also use the Reminder section to be alerted in your To Do List prior to the due date.
-
Show Rooms– Select Yes from this dropdown to add a Rooms Grid to your inspection or checklist.
-
Delay Tasks– Select Yes if you wish for failed steps to be sent out after the inspection is completed.
-
Multiple Fails– Select Yes if a step should be failed multiple times.
4. When you are done, click the green Create Template button.
6. To add subcategories, click the three dots in the category row and click Add Subcategory. Type in the subcategory name and click anywhere to save.
7. To add steps to your inspection/checklist, click Add Step. Enter in your step details in the Name your Step field. Click anywhere to save.
Select the category and subcategory you would like to add the step to if applicable.
The below options will only be available when creating an inspection:
If creating an inspection, choose a department for a task to go to if the step is failed.
Assign point values to each step in the Point field.
Mark the step as Required or leave this box unchecked to make it not required. If Required, you will have to mark that step before completing the inspection. If not required, then you will be able to skip the step.
Select Default to pass if you want the step to be pre-checked.
When finished, click anywhere on the screen to add the Step to your template.


